
Introduction
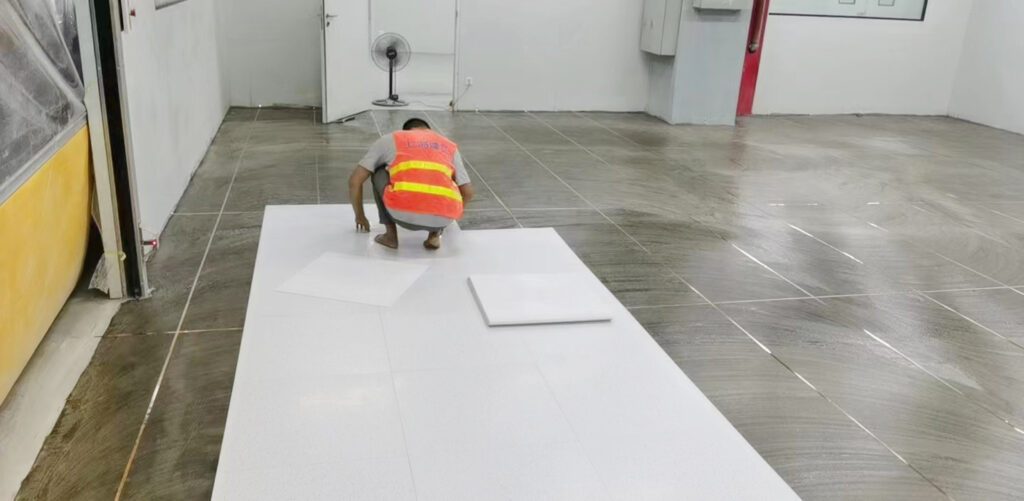
ESD (Electrostatic Discharge) flooring is a specialized flooring system designed to safely dissipate static electricity and protect sensitive electronic equipment from electrostatic damage.
ESD flooring installation should be carried out in accordance with the flooring manufacturer’s instructions and relevant international standards, such as ANSI/ESD S20.20, IEC 61340-5-1, and ANSI/ESD STM7.1. Proper installation is essential because the electrical performance of an ESD floor depends on the complete flooring system rather than the flooring material alone.
This article explains the complete ESD flooring installation process, including subfloor preparation, grounding system installation, conductive adhesive application, flooring installation, joint welding, and electrical performance testing.
Step 1: Subfloor Preparation and Surface Cleaning
Before installation, the substrate should be carefully inspected and treated to ensure proper bonding performance. The surface should be:
- Clean and free from dust, oil, and contaminants
- Smooth and level without cracks or uneven areas
- Dry and suitable for adhesive application
The installation process begins by removing debris from the floor surface. If necessary, sanding or grinding is performed to create a clean and suitable base for the flooring system.
After sanding, the ground should be thoroughly cleaned before applying conductive materials to ensure stable installation quality.
Step 2: Installation of Grounding Conductive Grid
The grounding system is a critical part of ESD flooring installation because it provides a controlled path for static electricity to discharge safely.
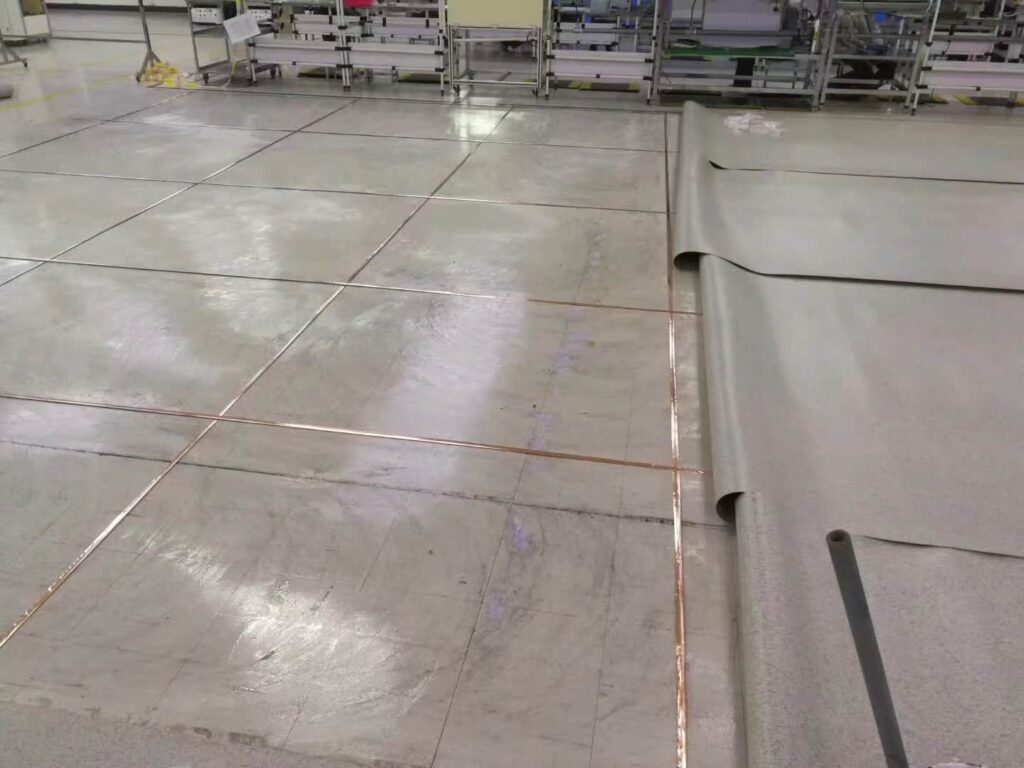
During installation, copper foil or conductive mesh is placed beneath the flooring to form a continuous conductive network. The grounding wire is then connected to the facility grounding system to ensure effective static dissipation.
The copper mesh should be arranged in a grid pattern, with copper foil passing beneath each flooring section to create an interconnected grounding system.
Step 3: Application of Conductive Adhesive
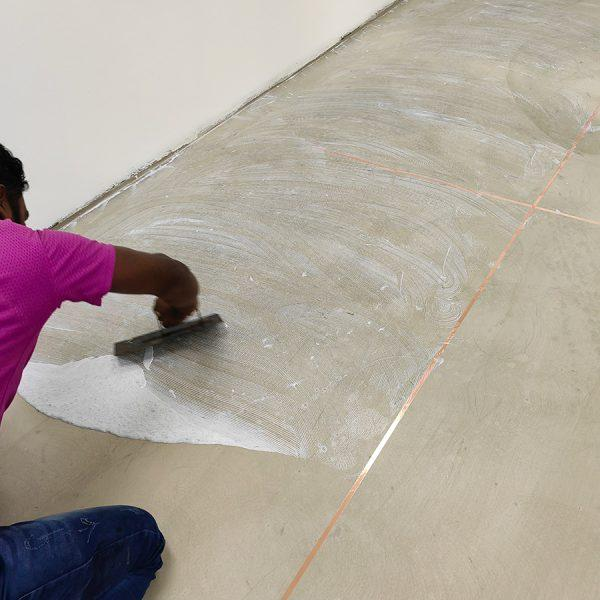
After the grounding system is completed, conductive adhesive is applied evenly to the prepared surface.
The conductive adhesive serves two functions:
- Fixing the ESD flooring material securely
- Maintaining electrical conductivity between the flooring and grounding system
Special conductive floor adhesive and professional application tools should be used to achieve uniform coverage.
The adhesive should be applied evenly and allowed to reach the appropriate condition before flooring installation.
Step 4: Joint Welding and Surface Finishing
For ESD vinyl sheet flooring, hot welding is commonly used to create seamless connections between flooring sections.
During this process, grooves are created between flooring joints and filled with PVC welding rods. After welding, excess material is removed to achieve a smooth and durable surface.
Professional welding equipment helps maintain stable temperature control and uniform welding speed, ensuring strong and reliable joints.
Step 5: Electrical Resistance Testing
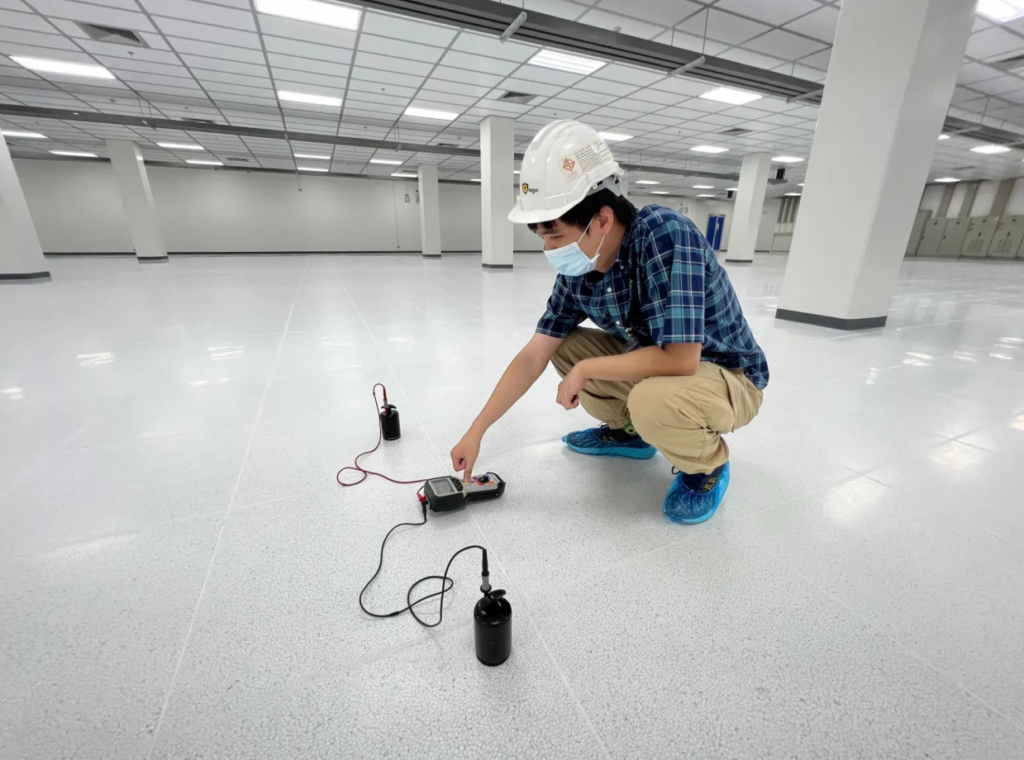
After installation is completed, electrical performance testing must be carried out to verify that the ESD flooring system meets the required standards.
Common tests include:
- Surface resistance testing
- Resistance-to-ground testing
- Electrical continuity testing
The completed flooring system should be tested to confirm that the electrical resistance meets the specified requirements before being put into operation.
This step is especially important for high-demand environments such as semiconductor manufacturing facilities, electronics assembly plants, cleanrooms, laboratories, and medical facilities.
Typical verification includes Point-to-Point Resistance (Rp), Resistance-to-Ground (Rg), and electrical continuity testing in accordance with ANSI/ESD STM7.1 or project-specific specifications.
Acceptance criteria should always follow the project specification rather than relying on a single resistance value.
Step 6: Final Treatment and Maintenance
After electrical testing is completed, final surface treatment and maintenance procedures can be carried out according to project requirements.
Conductive wax may be applied evenly to maintain surface performance, while the grounding connection should remain properly connected to the facility grounding system to ensure continuous static discharge.
Regular maintenance helps preserve the flooring’s electrical performance, appearance, and service life.
Conclusion
ESD flooring installation is a systematic process that combines floor preparation, grounding technology, conductive bonding, professional installation, and electrical testing.
By following proper installation procedures, ESD flooring can provide reliable static control, excellent durability, and long-term protection for sensitive environments.
A professionally installed ESD flooring system not only improves workplace safety but also helps maintain stable production conditions in industries where electrostatic control is critical.