
The ESD flooring tiles installation process, advised by Y.H.F, a China factory, is designed to achieve peak performance. Here are the detailed steps:
Preparation before installation
- Material preparation: ESD vinyl tiles, conductive adhesive, copper foil, welding rods, grinding machine, cleaning tools, standard scraper, PVC floor slotting machine, PVC floor welding gun.
- Acclimation: Before installation, Store all products indoors, on a dry, flat, level surface for a minimum of 48 hours. The facility must be fully enclosed, sealed, and weather-tight.
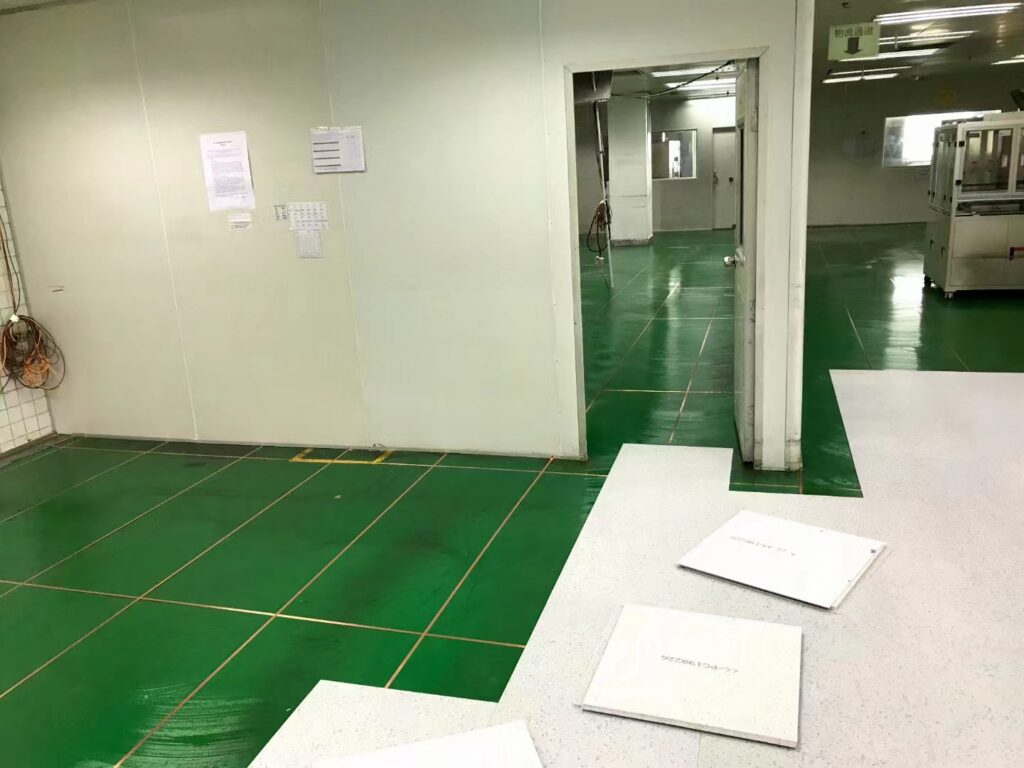
- Site preparation: First, prepare the ground on site remove the debris attached to the surface, and clean the ground after sanding it.
- Install go-round strips: Identify the proper locations for the strips, typically along the base of walls or at columns with access to a grounding point(e.g., electrical outlet).
Installation Process
- Conductive Adhesive application: Use only an approved conductive adhesive to install ESD vinyl flooring tiles. Apply the glue evenly with a standard scraper, and then wait for it to dry.
- Copper Foil Installation: Laying the copper mesh in a “#” pattern ensures that a copper foil passes under each ESD flooring tile to form an overall cross-connection.If necessary, apply conductive adhesive using a brush on the copper foils.
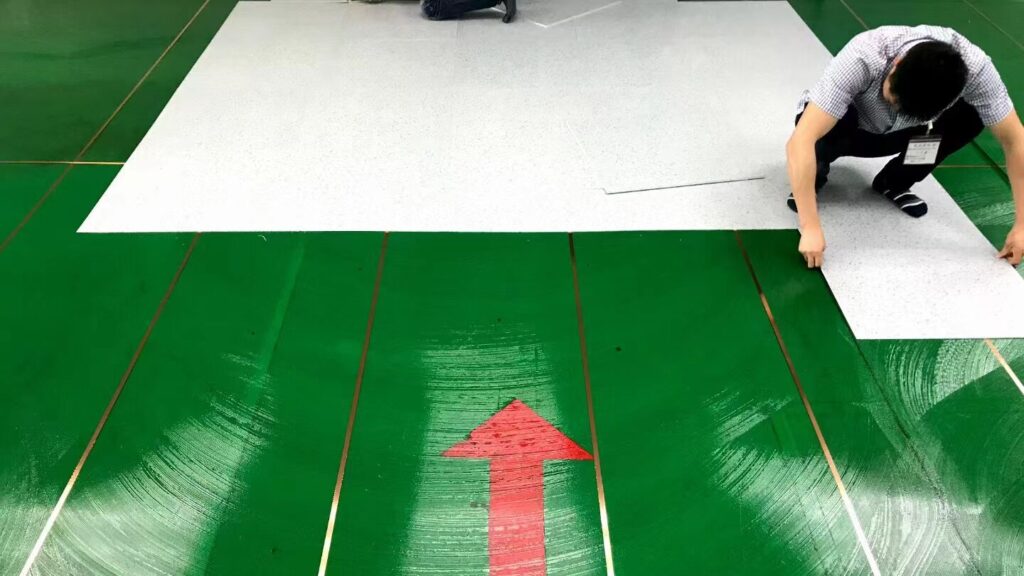
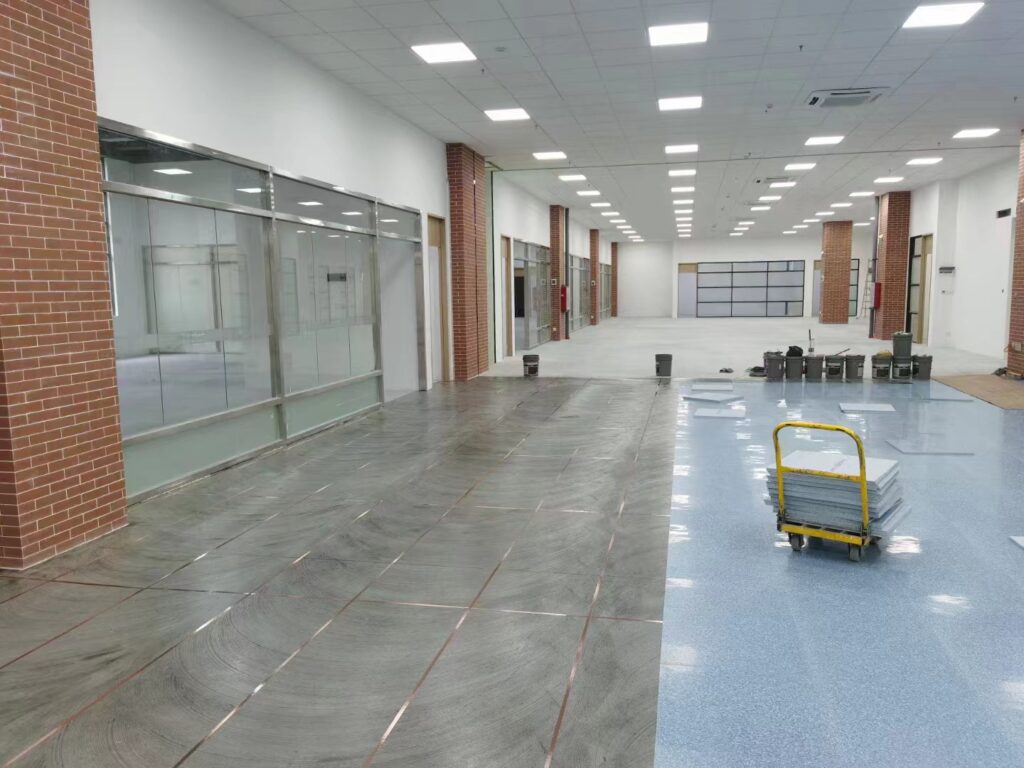
- Tiles Installation: ESD flooring tile is paved, the joints of the tiles are evenly connected and there is no misalignment.
- Note the directional arrows on the tile and install them in the same direction.
- For ESD Vinyl Tiles, use the traditional point-to-point method.
- Do not combine material from different lot control numbers in one area.
- Heat Welding: Use a PVC floor grooving machine to cut standard V-shaped grooves of uniform depth. Use a special PVC floor welding gun to weld floor welding rods with a stable temperature and constant speed. Ensure firm welding.
- After solid welding, remove the excess welding rod to make the interface smooth.
- Ensure the adhesive has been cured appropriately before heat welding.
- Allow the welding bead to cool to room temperature before trimming.
Post Installation
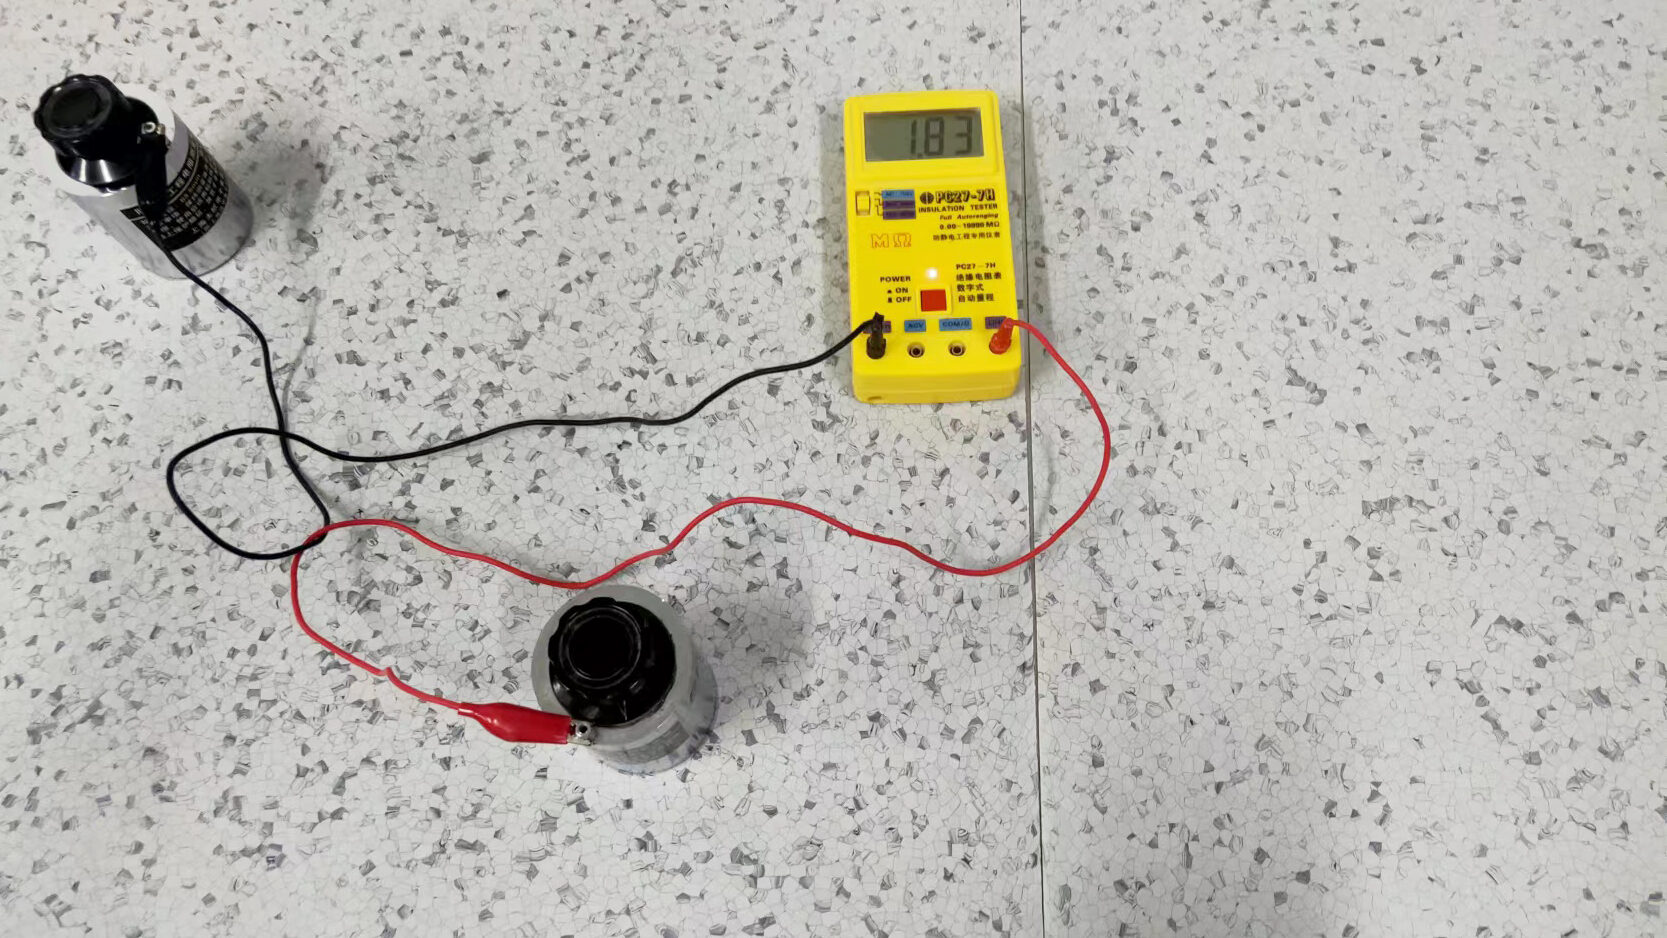
- Testing: The whole construction is completed, test the electrical resistance to meet the requirement.
- Cleaning and Initial maintenance: Sweep or vacuum flooring. Use conductive waxing to wax evenly.
- Restrict foot traffic for 24 hours after installation. No heavy traffic, rolling loads, or furniture placement for 72 hours after installation.
By following these steps carefully, an optimal performance of antistatic flooring tiles installation can be achieved.
Follow us on social media @Y.H.F